 By Tom Adams, Alen Baker
www.rockyrivertu.org/dry-fly-patterns.html
It is hot. The streams are beginning to get low and very clear and there are no hatches to be found. To find trout in North Carolina that will respond to these extremes, you are either fly fishing remote, highly canopied headwaters where it’s cooler, or you are on a larger stream looking for the deeper waters along an undercut bank that is overgrown with vegetation. So, what fly do you pull out of the fly box that will most likely attract a trout from the only comfortable place it can find.
The Grasshopper is fished as a dry fly, but not in a traditional since. Foremost, a grasshopper is a larger, bulky fly that defies a delicate presentation. However, as an exception to dry fly fishing, you really want your presentation to make a good, noisy splash just as a natural grasshopper would do as it falls into a stream. This would normally spook a trout in the spring or fall, but during the hot days of summer, a trout is typically hiding or feeding along the bottom or just into the shade along an overgrown or overhanging bank. In either case, the splash can invoke the attention of the trout.
The larger, bulky Grasshopper will also not float very long before it begins to slowly sink. Normally, when a dry fly begins to sink, it is immediately time to re-apply floatant to make sure you have a long, high drift on the surface. However, as yet another exception to dry fly fishing, you really want your presentation to gradually sink, just as a natural grasshopper would do, as it drifts downstream. Trout will take a Grasshopper on the surface as well as in the upper water column depending on how long the trout takes to follow and move over into a position for the take. Once the Grasshopper fails to initially float on the surface, you should re-apply floatant to assure some surface drift, and then work through a few passes again.
The Grasshopper may be tied in a number of sizes, styles, and colors. Sizes used on trout streams range from size 14 down to size 6. The styles vary from somewhat simple attractor patterns to very elaborate, almost realistic patterns. Watching Dave Whitlock tie his world-famous Dave’s Hopper fly will give you a whole new meaning to fly tying. I had to practice to be able to tie a Dave’s Hopper in less than 30 minutes. But one must consider that the fly is so highly effective that you need a few in the fly box even if you have to purchase them.
Grasshopper patterns on the market are typically unique in style and sold simply by size with a few patterns that may come in an alternate color. For example, Dave’s Hopper, Joe’s Hopper, and a few other patterns are tied with a yellow body or a green body. Sometimes the green body can also represent a katydid as there are only a few Katydid patterns. A black or brown pattern is typically a Cricket as there are a good number of patterns that parallel specific hopper styles such as the Letort Hopper and the Letort Cricket. Over the years, I have purchased many different hopper patterns and have literally collected the various styles. I have three full boxes, each with 18 slots and each slot with a different hopper pattern. I am sure there are many more I have not encountered.
To fish the Grasshopper, use a larger 2X-4X tippet size to better match the Grasshopper size. I use fluorocarbon which is more transparent in water than mono such that a larger size is less noticeable. Cast upstream and across for a drift much in the same manner as fly fishing a traditional dry fly. The larger, bulky Grasshopper will take some adjustment in the pause time on the back cast as it drops quickly. The Grasshopper is presented in the same manner as a dry fly except the sheer weight of the fly will plop the surface with a good splash that demands the attention of any trout nearby. Drift the hopper down each feeding seam as well as very, very close to the stream bank, literally under the overgrowth if possible. Let the hopper sink for a few feet further downstream just in case a trout is following or even waiting for the hopper to get close for the take.
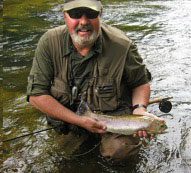
My most memorable experience using a Grasshopper is a day in Yellowstone Park on Gibbon River in 1988. The Gibbon River is a fast flowing, freestone stream down to Gibbon Falls, then the streams meanders through Gibbon Meadows until it flows into Firehole River. The stream through the meadow flows through overhanging wild grass on both sides, ideal hopper country throughout. My first cast that did not hang up in the grass drifted only a few seconds before a huge fifteen-inch brown chomped my Yellowstone Hopper and headed down stream like a freight train. I recall catching the most browns ever in a single day on several different hopper patterns.
This is a fly for the dog days of summer in North Carolina.
Fly of the Month 8.12 Hopper Juan
Hook: Streamer, 3x to 4x, Tiemco 5263 or equivalent
Size: 4, 6, 8, 10, 12
Thread: UTC 140 in color to match
Body: 1.5mm Closed Cell Foam two colors of choice
Wing: Plain Web Wing material (MFC)
Note: There are numerous foam patterns available. This is a straightforward yet handsome grasshopper imitation with great visibility, good support for droppers, durable and easy to tie. There are also other photo illustrations for classic variants of hopper patterns. They are time proven and quite honestly not a difficult tie. Try them all!
Detailed tying steps may be found at the Rocky River Chapter of Trout Unlimited at www.rockyrivertu.org/dry-fly-patterns.
Directions:
1) Cut the two foam pieces to size for the hook of choice. You may cut the pieces with scissors or craft knife. Make sure if you cut them without a manufacturers cutter, you allow sufficient length. The foam should extend past the hook eye and the bend by one hook gape for each position. Rounding the front is not necessary and I trimmed the tails after tying in everything else. In use, for the patterns shown, are MFC Hopper/Stonefly cutters. These are available from most fly shops and come as a set or individual based on hook size. Closed cell color foam is available in fly shops or craft stores. The fly shops will have the best assortment of the correct colors, but either will do. Vary color patterns to suit the time of year and location where you are fishing.
2) Choose the bottom color of foam and skewer with the hook point allowing a segment to protrude beyond the hook bend. There will be sufficient length to extend beyond the hook eye. Slide the skewered foam into position such that it is under the hook shank. Rotate the foam out of the way and wrap the tying thread on, beginning two eyelengths from the hook eye. Spin the thread counter clockwise, flattening the thread and wrap in, in tight, overlapping wraps to above the hook barb. Let the bobbin hang.
3) Return the foam, laterally along the hook shank and after aligning take the bobbin and make the first wrap to bind the foam to the hook. Apply the thread in a very vertical and perpendicular (to the hook shank) wraps, fashion and secure with no more than three turns, one on top of the other. Let the bobbin hang.
4) Select the other piece of foam and match the tail ends. Holding the two pieces with your left hand, wrap the thread in the exact place as the bottom section. Once you are happy with the position make two more, tight wraps maintaining that single line of thread, and secure the top to the bottom.
5. Advance the thread to the next bottom segment (pushing the top foam section out of the way) location. The distance of the segment should be the next third of the hook shank. Wrap one or two soft wraps to assure you like the position, then no more than two firm wraps to secure. You will notice that a concave dimple has occurred between the two segments of the bottom. Place a small drop of CA (Zap-A-Gap style) cement in the dimple and place the upper section of foam in alignment and make one soft thread wrap for position and then two firm thread wraps to finish that segment.
6) Advance the thread to the next position, one third of the remaining space to the hook eye. Pull the bottom segment up to the bottom of the hook shank and make one or two soft wraps to verify that you like the position. Wrap tight with two turns and apply the cement.
7) Bring the top piece of foam down and secure with one or two soft wraps. When you are happy with the placement secure with two firm wraps. Advance the thread to half the distance to the eye hook and secure the bottom piece of foam. Before bringing down the top piece trim the bottom foam so that the eye is free.
8) Add the cement and bring the top foam down as you did above. There will be a section of foam protruding past the eye that remains untrimmed at this point. Bring the thread across the top of the first segment (closest to the eye) with one movement making a forty-five-degree line across the top of the top piece of foam. Let the bobbin hang.
9) Cut the wing material in a similar manner to the body but taper it slightly so that it is more narrow towards the eye. Tie in at the first segment (closest to the eye) using one light wrap for position and one firm wrap to secure. You do not want any buildup of thread at this point. Make sure your wraps remain directly on top of one another. Let the bobbin hang.

10) Select four or five strands of sparkle and tie in with two wraps on top of the wing. These will trim slightly longer than the wing. Let the bobbin hang.
11) Select a portion of elk hair and after cutting, cleaning and stacking tie in on top so that the evenly matched tips are rearward and slightly longer than the length of the abdomen. When tying the hair wing in use the pinch method for placement and make two firm but not tight wraps. Using your left hand keep the hair on top and tight as a unit while you add two more turns of thread but with a lot more pressure than before. You want the wing to lift but not stand straight up. Trim the excess directly in front of the tie in. You will notice after securing the hair wing has shortened somewhat so that it does not protrude past the wing. Let the bobbin hang.
12) Use your right hand to bring the top piece of foam back to the hair wing and secure with two firm wraps. Trim the excess foam and let the bobbin hang.
13) At this point if you so choose you can add a bright or white piece of Antron to act as an indicator. Just tie in a small piece with two wraps and trim to the height you prefer.
14) Choose two pieces of round rubber striped or unstriped legs. Place one at the tie point and make one soft wrap to hold it in place. Repeat on the other side and make two firm wraps to secure them.
There are many, many hopper fly patterns including Hopper Juan Green, Hopper Juan Red Orange, Hopper Juan Red Tan, Joe’s Hopper, Madam X Olive Hopper, Madam X Hopper and Letort Hopper.