Last month, we discussed basic wind knowledge, choosing the correct kite for the conditions as well as basic set up. However, before a kite is ever flown, you should have mastered your understanding of the safety systems and protocols.
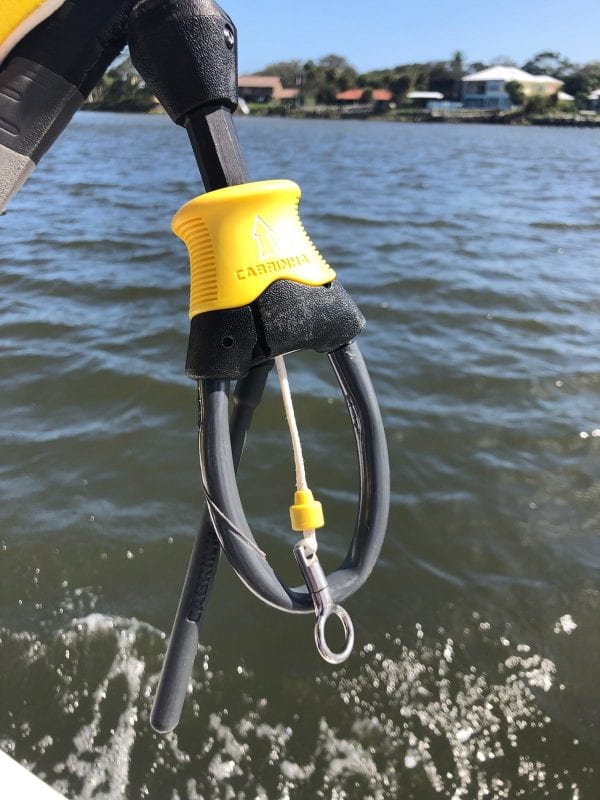
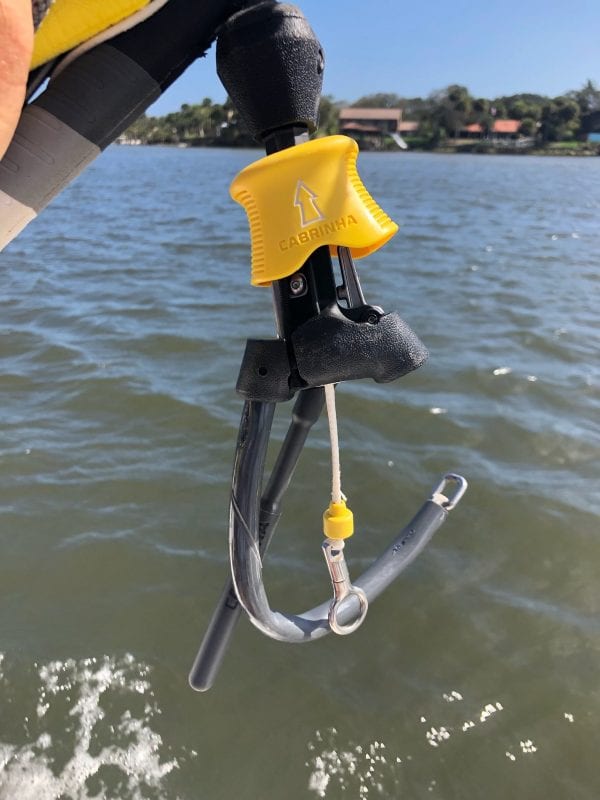
By far the most important safety mechanisms are the safety releases, there are usually two. The first and most important is the main release, this is located just above the chicken loop (the loop that connects the kite/lines to the rider’s harness). Although there are variations of the design of this mechanism, the general rule with all releases is that they pull away from the rider. This allows the kiter to use the tension of their body to pull against and activate the release. Once this release is activated, three of the four lines (on a four-line kite) will go slack, allowing only one of the center lines to take the pressure. This deactivates the kite by causing it to “flag out” and fall out of the sky. If you are in deep water, the kite can then be turned into a sail-able raft that you can lay on and use to navigate back to the beach. This is called the self-rescue technique and must be demonstrated by an instructor.
In very rare cases the main release is not enough to avert the situation at hand. In this case there is one more release located on the end of your “safety leash”. This leash is connected to the “flagging line”, which is the one line that remains connected after the main release is activated. When activated, this secondary release will completely separate you from the kite/lines. It is important to note that the secondary release will do nothing without first pulling the main release.
Once you’ve been taught all of the above by your instructor, it will then be time for a launch. Typically, the instructor will be the initial kite flyer and you will be the kite launcher. This means that the instructor will walk 90 degrees to the wind on one side and you will walk 90 to the other, making the lines perpendicular to the wind direction. From there, both parties will double-check the lines and systems for any tangles. If all looks good, the instructor/kite flyer will walk a few degrees upwind so that the kite starts to generate lift. At this point, the kite flyer will give the kite launcher a thumbs up. This signals that it is okay for the launcher to let go of the kite. Never let go of a kite before you see a thumbs up!
Now that the kite is airborne, basic controls will be discussed. There are four main controls, left, right, sheeting in (pulling bar in), and sheeting out (pushing bar out). Sheeting in will pull the trailing edge of the kite in and create more lift/more power while sheeting out does the opposite. To turn the kite, we have to create drag on one wing tip or the other. For example, if I want the kite to go left, I pull the left side of the bar towards me while pushing the right side away from me. Often beginners try to steer the kite like a car steering wheel. The kite will not respond to this.
Our kite is now airborne and we understand the basic controls. The excitement continues next month when we learn to create and manage the power we need to ride!
Please remember this series is not intended to replace hands on instruction. Never attempt to learn to kite without a certified instructor.
FORECAST BY: Jeremy Lund
Lead instructor and owner of New Wave Kiteboarding
Email: Jeremy@newwavekiteboarding.com
Website: NewWaveKiteboarding.com
Find us at Sailfish Marina in Stuart, FL
(561) 633-9362