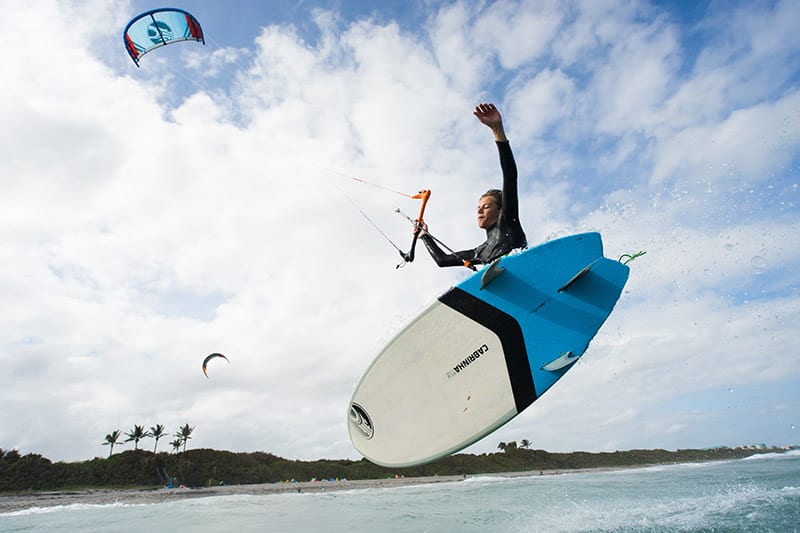
In March, we discussed our safety protocols along with basic kite controls. As a quick recap, there are three main safety protocols: (1) let go, (2) activate main release, and (3) activate secondary release. Remember each one is circumstantial to the situation. For control, we discussed steering but also “sheeting”. Sheeting-out, means to push the bar out, this will de-power the kite by releasing the trailing edge. Sheeting-in means to pull the bar in, this will add power and control as it pulls the trailing edge of the kite back towards us. We then discussed our first “instructor assisted” launch. Now that the kite is flying we are going to discuss how to and how not to create power with the kite.
One of the first things we teach our students is a basic understanding of the wind-window, a spherical shaped area that the kite can fly in, relative to our position. Five articles could be written on this subject alone, but here are the basics.
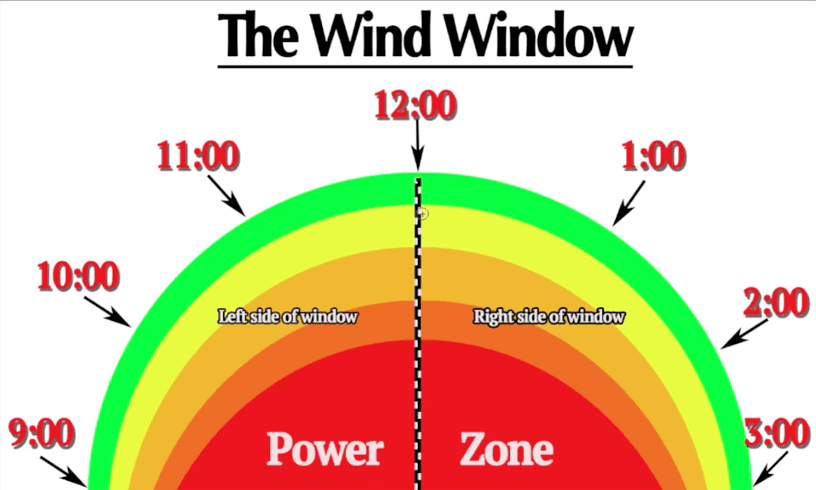 If you were to look straight down wind, you would be looking at the power zone. When the kite passes through this area, it creates its maximum amount of lift/power. It helps to visualize this as being red. If we were to turn and face 90-degrees to the wind, we would be staring at the edge of the wind-window. This is the area that is the least powerful for the kite and the kite will not penetrate any further into the wind than this. Let’s visualize this area as being green. This green zone extends in a small strip all the way from three o’clock on one side of us to nine o’clock on the other. The edge of the wind window is a complete outline of the wind window, which you can now visualize as being a half sphere.
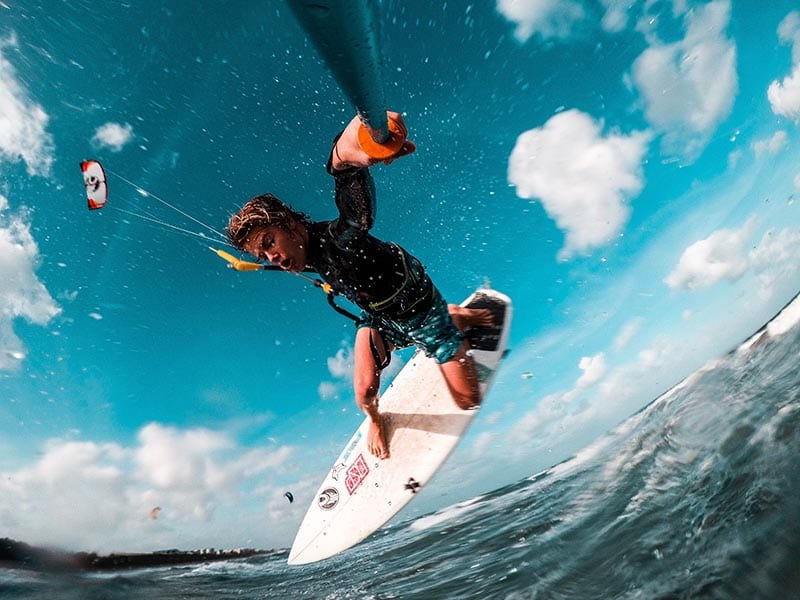
Generally, your instructor will take a fair amount of time teaching you to fly the entire edge of the wind window. That way, they know you can get the kite to where you want it without being dragged or lifted. Once this is mastered, it will be time to learn how to create and manage more and more power. To do this, we will maneuver the kite deeper and deeper into the wind window while sheeting in and out various amounts. This maneuver is called a power stroke. This stroke will resemble a figure-eight pattern as the kite dives and returns to 12 o’clock. At first, we will focus the kite in an area halfway between the power zone and the edge of the window, lets visualize this area as being yellow. As the kite goes deeper into this yellow zone, it accelerates and creates more lift. This is because the kite is now pulling more air across its leading edge. This additional airflow is called apparent wind. It is essentially any wind/airflow you create in addition to what mother nature has already provided. If you don’t understand lift, it can be very helpful to do some research on how a wing works, because that exactly what a kite is.
Once the “power stroke” is mastered, it will be the tool we use to get up and riding on the board. But we must first learn to use the kite and our body alone to get wherever we want in the water. This maneuver is called the body drag, in the guaranteed event we lose our board, body dragging will prove to be useful and necessary.
Next month, we’ll take to the water. Please remember this series is not intended to replace hands on instruction. Never attempt to learn to kiteboard without a certified instructor.
COLUMN BY: Jeremy Lund
Owner & Lead Instructor
New Wave Kiteboarding
Email: Jeremy@newwavekiteboarding.com
Website: NewWaveKiteboarding.com
(561) 633-9362